Tuesday, November 30, 2010

Spotlight on All About Being Inspired!

If you have been following All About Being Inspired from the beginning, you know that we have only been up and running for about 3 full months now! It has been a learning experience, a motivational tool to keep my mind creative and of course a brand new hobby!

I am truly enjoying this new endeavor and hope that you are reaping some of the benefits as well! Today, I am excited to announce that I am featured in an online magazine called RedRoverStyle.com spotlighting All About Being Inspired!

You can click on RedRoverStyle.com above or click here to view the article: http://redroverstyle.com/2010/11/valerie-woods-inspires/


"RedRoverStyle.com is a lifestyle and charity magazine that brings people together to dialogue and network with philanthropists and charities." I would be honored if you read my interview at RedRoverStyle. Read on to find out more behind the scenes information about All About Being Inspired and how it came to be.  While you are visiting, browse the magazine because it features some great fashion tips, beauty info, food and travel tidbits and much more! 


BE INSPIRED!


P.S. Remember to leave a comment on any one of our blog posts before December 3, 2010 (That's this Friday!) to be entered into our first Giveaway! Believe me, it's a good one...a set of 4 handpainted watercolor cards!

Monday, November 29, 2010

Beauty in Bloom

 
I belong to a Mom's group called MOPS (Mothers of Preschoolers...www.mops.org) and I have met so many wonderful moms in such a short period of time. Amongst them are two amazing, sincere mothers: Jamie Cone and Tara Silvestre who have recently launched a small business called Beauty in Bloom. Beauty in Bloom works to help girls build confidence and self-esteem by reminding them about what really matters and what really makes them a beautiful person; true beauty blossoms from the inside out. With character-building activities and games, crafts, face painting and/or age appropriate make-up and hair, your girls will be enjoying themselves in an educational, fun setting!

If you are looking to throw that special girl in your life an inspiring, confidence-building, beautiful party that will enlighten them about what really matters, visit www.beautyinbloomparty.com for more  information and how to book your party!

I was inspired to post about this new small business because I not only wanted to share a way to host a creative party but wanted to inspire you to go after a dream or idea that you may have in the back of your mind. Anything is possible with a little sweat and hard work! One day I was inspired to create a blog and I did just that! 

BE INSPIRED!


Friday, November 26, 2010

Fruit Filled-Thrifty Gifty #6


I hope everyone had a wonderful Thanksgiving yesterday! After dinner at my in-law's house I noticed what would make another awesome "Thrifty Gifty"...a fruit filled jar of clementines! Clementines are so seasonal and delicious! The best part of this is that you can usually find them on sale at your local market or grocery store. I was at Shop Rite this morning and a whole crate of them were on sale for $4.99. Shop your local Goodwill for jars and turn up the most unique vessels for piling up these colorful treats!

You can easily put this lovely hostess gift together for under $10.00! I would love to receive something of this nature from a friend! It is healthy, delicious, makes a lovely centerpiece and adds a festive splash of color to anyone's tablescape or countertop!

Make this gift extra special by wrapping it in clear cellophane with a knot of raffia at the top! Add a gift tag and voila!


Remember that clementines aren't your end all...there are so many beautiful seasonal fruits like pears, lemons, pomegranates and apples that would fill any jar with holiday bliss!

BE INSPIRED!

Thursday, November 25, 2010

Happy Thanksgiving!


Happy Thanksgiving to all of our wonderful readers! I am thankful for so many things in my life as I am sure you are as well! If you are wondering how you can acknowledge all of your thanks, ask each person at your dinner table today to share one thing that they are thankful for! My family and I have done this in the past and it is really very special. I am so thankful for my amazing husband who is always there for my son and me, for our parents and family and most of all, my Lord, Jesus!

My mom and I are also very thankful for your dedication to our blog! 

I thought you would enjoy reading some quotes that I found regarding thanksgiving! Also, if you like the image that I posted above, you can find it here:  http://inspyretash-stock.deviantart.com/art/VintagePostcardThanksgiving2-107942315. It is free, however, if you use it, the artist asks that you give credit and leave a message for them on how it was used. I added the text "Happy Thanksgiving!" Wouldn't these make lovely place cards for your guests today? How about asking each guest to write one thing they are thankful for on their card or copy and paste some of the quotes I have below onto each card for sharing amongst family and friends today?

As you read below, I am wishing you and yours a very Happy, safe Thanksgiving!  

BE INSPIRED!


• Be joyful always, pray at all times, be thankful in all circumstances. (1 Thessalonians 5:16)


•Thanksgiving dinners take eighteen hours to prepare. They are consumed in twelve minutes. Half-times take twelve minutes. This is not coincidence. (Erma Bombeck)
 

Do not get tired of doing what is good. Don't get discouraged and give up, for we will reap a harvest of blessing at the appropriate time. (Galatians 6:9)


•A thankful heart is not only the greatest virtue, but the parent of all other virtues. (Cicero)


•God gave us our relatives; thank God we can choose our friends. (Ethel Watts Mumford)


•Let us remember that, as much has been given us, much will be expected from us, and that true homage comes from the heart as well as from the lips, and shows itself in deeds. (Theodore Roosevelt)


•For each new morning with its light, For rest and shelter of the night, For health and food, for love and friends, For everything Thy goodness sends. (Ralph Waldo Emerson)

Monday, November 22, 2010

Updated Look

Hi Friends!
Currently, I have been working super duper hard in making our blog more user friendly! I hope you notice a difference. I have been inspired by other blogs and their "eye candy" if you will and decided I had to take it up a notch! I added a navigation bar, which is working, however, the information has to be placed on the links...which is coming soon! We have a FAQ link, which will explain in simple terms how to post and navigate around the blog. I hope this will encourage your commenting!

I am learning a lot through this process so if you are wondering if you are in the right place when you enter All About Being Inspired, you probably are! Don't be surprised if you see more changes in design of the site in the future until we are 100% happy with what we have to offer you design and navigation wise!

My mom and I anxiously await your comments and thoughts about anything we have posted or on anything you would like to see on the blog!

Enjoy and BE INSPIRED!

Saturday, November 20, 2010

Creating a Holiday Smokey Eye

One of my dearest friends is here for the weekend from Montreal and she is amazing at doing makeup! I asked her if she would create a Holiday Smokey Eye that I could post on the blog and she happily agreed. We documented every step for you along with photo descriptions and images of the brushes that were used to get the desired look.


We hope this will inspire you to experiment with what you have in your makeup drawer!

Step 1: With foundation and concealer, we prepped the face covering every inch with a base coat (over the eyes, cheeks, lips, etc.) as if we were going to apply makeup to the whole face. Here I am with just foundation awaiting my Holiday Smokey Eyes! As you will see, the color scheme used for my smokey eye was silver/grey. The shimmer of the silver is a nice way to add a little more Holiday glitz to your makeup routine!


Step 2: With a round brush, apply the medium shade of gray by tapping it to the whole mobile lid and halfway up the crease. Do so with the round brush seen below.
Step 3: Apply the shimmery silver color to the brow bone with the round brush again, by tapping the color in. For extra drama, you can add some to the inner corner of the eye.

Step 4: This next step requires that you use a slanted brush (as seen below). It is also a good idea to place a tissue under the eye to avoid the dark powder falling under your eye and creating a mess! So, apply the darkest shade of grey (charcoal) or black along the lash line and also halfway along the crease (outside in), as seen below.


Step 5: This is the last step in finishing off the eyes! With a round fluffier brush, blend, blend, blend by following the lash line and the crease!


Step 6: Once this is done, add your favorite mascara. For drama, add a nice voluminous black one!


Step 7: Finishing the Look. The look was finished by applying some bronzer to the top of the cheekbones, temples and jaw line (it follows the shape of an E along the side of the face). Then, smile and apply rose blush to the apples of the cheeks. Be careful not to lay it on too much...and Voila! This look will have all the people at your holiday party asking how in the world did you succeed in creating a smokey look and manage to get dinner ready as well?!!?! :)


BE INSPIRED!

Friday, November 19, 2010

Candle Centerpiece-Thrifty Gifty #5

The holidays are rapidly approaching and if you are like me, you may tend to grab a pencil and paper and start making lists of the people you want to give gifts to. For many on my list, I like to give a handmade item because when you make a handmade item, it speaks to the heart of the recipient telling them that you spent that extra special moment thinking about them personally. The thrifty gifty that I am going to tell you how to make today is a great hostess gift for Thanksgiving or a wonderful Christmas gift for one that you love.

The candle centerpiece shown above is a simple, practical and beautiful handmade item that can be created in any size and on any budget. It can be filled with a beautiful berry garland shown above or stashed with sand and seashells for the beach lover. The great thing about this thrifty gifty is it's ability to be personalized for that special someone as you can fill the base with almost anything you can imagine.

The key to this creation is to make sure that you purchase a candle that burns into itself. A drippy candle is not a good option because the hot wax will melt onto whatever decoration you may have in the base of the jar.

Finding jars is easy and doable on any budget. Pier 1 Imports always has amazing glass containers as does HomeGoods if you are looking for something unique and one-of-a-kind. Find a lightly scented candle at Michaels or AC Moore and the filler for your jar at a local arts and crafts store or a HomeGoods/Marshalls/Walmart/Target-type of place. This thrifty gifty can be put together with a one-stop shop or you can shop around for unique one-of-a-kind pieces and compile them all together. Either way, you will be creating something extraordinary.

Dim the lights, put on some dinner music, light your new candle centerpiece and BE INSPIRED!

Monday, November 15, 2010

When my children were small I started a tradition of giving each of them something that was handmade at Christmas.  It did not have to be something that was a monumental task to create but it was something that I created using my own hands.  I wanted them to know that the holidays were not only about the gifts that we received but more about the thought and love that went into the making and giving of the gift.  To this day, they each follow the tradition and create a gift that they give to me.  I eagerly await the creation.  It is always a special treat to see what they have come up with.

Each year my children look forward to seeing what I have thought up for this year.  I also try to make something handmade for special people in the family.  Some years I get further than others.  But it is a goal I try to reach.  Often, I can make one large batch of something and then split it into several gifts.  If you would like to start some traditions of your own, here are some ideas for giving gifts from the heart:

1.        Can you cook?  Then you can create some wonderful gifts!  Caramel corn, flavored vinegars, a batch of cookies, or anything you are good at can make a wonderful gift of love!
2.       Can you sew?  Handknit or crocheted scarves, sock dolls, pincushions, or any small item that does not take too long to create would be loved by the recipient.
3.       Can you cut and paste?  My mother-in-law makes the greatest handmade cards using recycled cards she has received.  She cuts and pastes and remakes them, adds some ribbon and packages them into “sets” to give as gifts.  When we want to send a special card to someone we only have to dig into one of the sets she gave us and we have an amazing card to send to someone.  The craft stores are full of blank cards you can buy and then decorate.
4.         Can you bead?  Beaded jewelry is all the rage and who wouldn’t love a beautiful, hand beaded necklace?
5.       Why not get the kids or grandkids involved in this process?  Ask them to come over and make something special for their Mom or Dad.  What a great way to spend time with your children or grandchildren.  I guarantee that they will remember that time spent with you for a long time to come!

If you feel like you are not creative, why not take a class?  You can learn to do something new and then practice it by creating gifts for your loved ones.  The gift itself is less important than the fact that someone took the time to make something special for another.  Start some new traditions!

Sunday, November 14, 2010

Anthropologie – Trim Video

I was browsing one of my favorite stores online-- Anthropologie and thought that this was the cutest little video that they made! I love stuff like this!
Anthropologie – Trim Video

Easy Homemade Granola-Thrifty Gifty #4


For a most delicious and healthy "Thrifty Gifty" idea, you can't go wrong with this yummy homemade granola! Whip up a batch or two and put a few scoopfuls into a mason or ball jar with a crafty label and voila! You will be the hit of any breakfast table or ice cream social as you can use this yummy treat over yogurt or ice cream. I personally even like to eat it by the handful!

Here is the secret recipe...that's not so secret anymore!!!

• one 18 oz container of Old Fashioned Oats
• pecans, walnuts, almonds, and/or pumpkin seeds added in accordance to your liking
  (I usually stick to a 2:1 ratio of oats to nuts.)


• Melt 1/2 lb (2 sticks) of butter and add to the mixture of oats and nuts.
• Add 1/2 cup of Extra Virgin Olive Oil to the mixture as well.

• Drizzle in some vanilla and REAL maple syrup to taste.
• Add a dash of salt.
• Bake at 250 for 2 hours
• Toss every 20 minutes
• If you would like to add chopped prunes, apricots or craisins, add during the last 10 minutes
  (to prevent the fruit from getting hard enough to crack a tooth!)


Enjoy and BE INSPIRED!

Thursday, November 11, 2010

Giving Thanks!


Unbelievably, the year is coming to a close.  November and December are upon us and soon we will be starting 2011.  Families and friends will be gathering and celebrating holidays.  There will be gifts to buy, food to cook, decorations to place around our homes.  Let’s be creative in the way we celebrate the holidays this year.

Thanksgiving is a wonderful time to gather together to give thanks.  One way to emphasize the meaning of Thanksgiving is to have each person write down one reason they are thankful before dinner.  Have a little pad with a pen handy and ask your guests to jot down their thoughts and then place the papers in a small basket.  Before dinner or during dessert, choose someone to read everyone’s thoughts about thankfulness.  This is especially fun for the younger crowd because it causes us to pause and verbalize things that are very often unspoken.

Another version of the above idea would be to have a sheet of paper with each person’s name on it.  When your guests arrive ask them to write something they love about every other person.  You can then hand out the completed papers for each guest to read about themselves.  You will be amazed at how wonderful each person will feel after reading a paper about themselves.  These are little things that we seldom take the time to do and yet they promote “goodwill among men.”

Sunday, November 7, 2010

Holiday Post Cards


So...who said that holiday greeting cards have to be the same old standard thing? This year I am sending out Post Cards! Yes, you read it correctly...Post Cards!

Before taking the plunge to do something totally different, I went onto all of my favorite photo web sites and scoped out how much it would cost to order a bundle of greeting cards personalized with a message and photos. Some cards run $1.25 a piece! I thought there has to be a better way! So I visited my loyal vistaprint.com and ordered 100 personalized postcards for $24.99. I uploaded my own design, which added another $4.99 plus shipping, which was about $6.99, totaling under $40.00 for 100 cards! That's 40 cents per greeting!

 Click on this link to directly take you to the Post Card page of Vistaprint: http://www.vistaprint.com/postcards.aspx?xnav=LeftItem&xnid=AdvertisingMarketing_Postcards&dng=1986090&rd=2

The benefits of sending out Post Cards this holiday...
•Saving money on the actual holiday greeting (40 cents per greeting!)
•Saving money on postage (postcard stamps only cost 28 cents for the average sized post card.)
•Being able to write a personalized message by hand to the recipient on the backside! (I think this adds such a nice, personal touch!)

If you are design savvy and have programs such as Photoshop or Illustrator, you can download a Post Card template off of the vistaprint web site, which has guidelines for designing your own. If you are not design savvy, you can choose from a variety of holiday designs and type whatever you wish in the text boxes on the front of the cards.

The attached image above is a preview of what we are sending out this year so those of you on my "nice list" are getting a sneak peak of what you will be receiving in the mail come December! I hope I didn't spoil it for you but I couldn't keep this great money saving idea a secret!

BE INSPIRED!

Technorati

Technorati Claim token: VG8B8CNA8FK3

Friday, November 5, 2010

Decoupaged Hand Mirrors-Thrifty Gifty #3

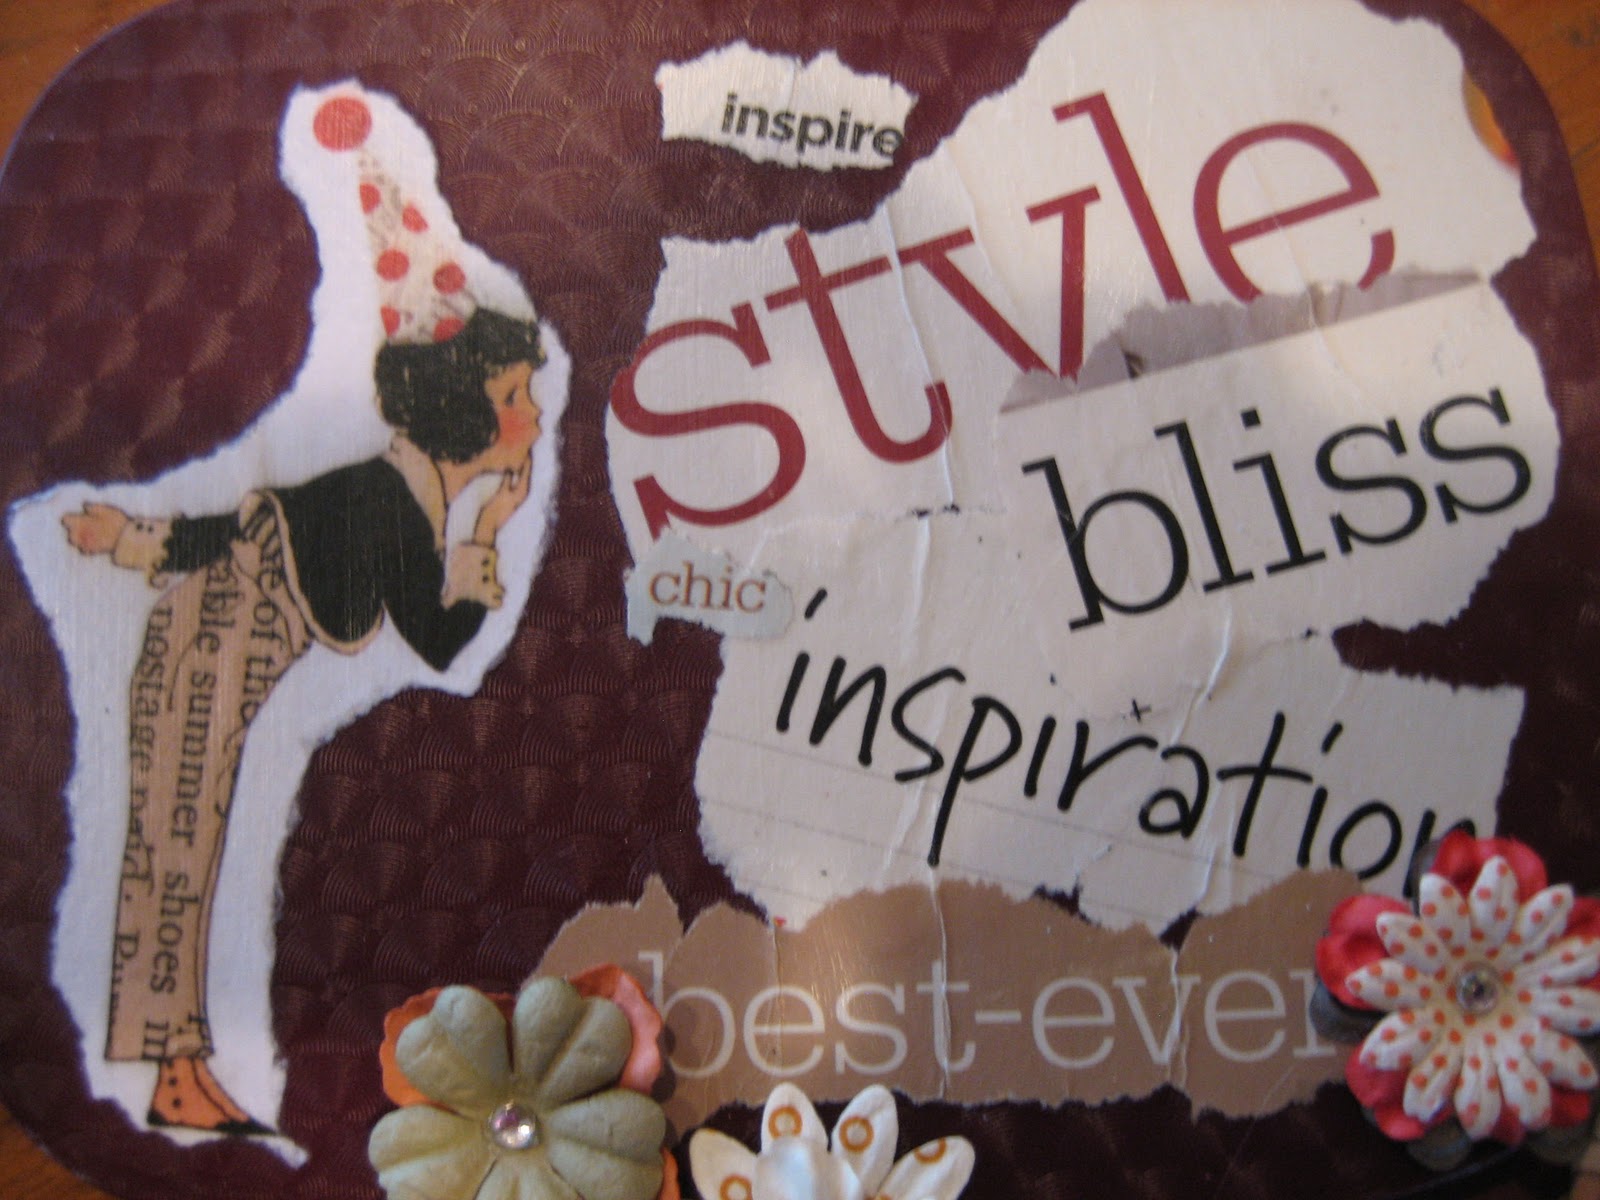
Detail of Hand Mirror
Thrifty Gifty Hand Mirrors

This "Thrifty Gifty" idea is a lot of fun to make and can be thoroughly personalized for that special someone! Who wouldn't want to look into a mirror and be reminded of all of their wonderful attributes that are decoupaged on it?

Using hand mirrors, scrap book paper, old magazines, embellishments, mod podge and more, you can create these kitschy, fun, practical gifts in no time!

Flower Embellishments that I bought at A.C. Moore!

This is what the bottle of Mod Podge looks like.
Here's what you will need as far as materials go:

Mod Podge (Available at A.C. Moore or Michaels Arts and Crafts--Remember to use the 50% off coupons that are online or in the circulars!)  I bought a large bottle but they come in much smaller containers if you don't want to commit to a large bottle.

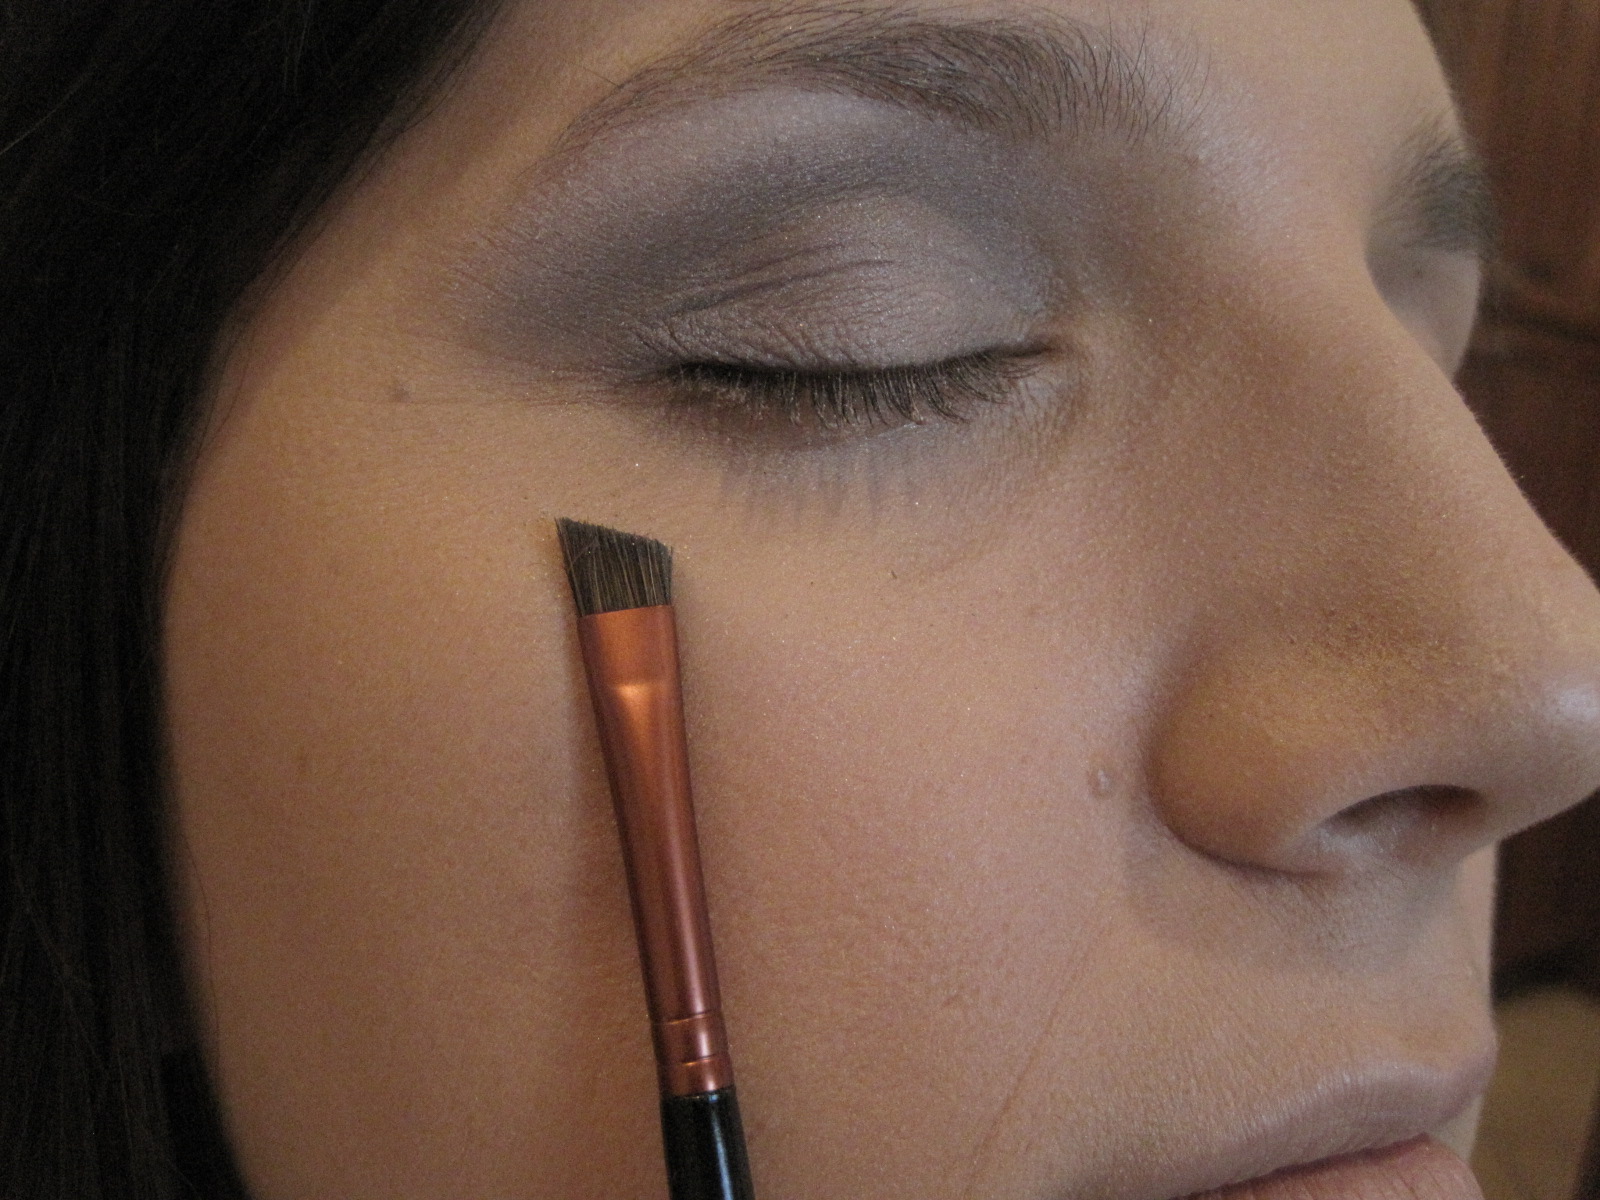
Foam applicator brush (I found mine in Walmart, although they definitely have them in the arts and crafts store.)

Hand Mirrors (I found a whole bunch of all colors, shapes and sizes at my local Dollar Tree store)

Old Magazines, Scrap book paper, paper dolls and/or free images that you can print off of the web (try google images).

Embellishments such as the paper flowers posted in the image above, chipboard alphabet stickers, rhinestones, ribbon and whatever else you may have hanging around the house. (All of these materials can be found at the local craft supply store in their scrapbook department.)

Hot Glue Gun and Glue Sticks (If you have never used a glue gun before, please be careful as it gets very hot.)

Bucket of water and paper towels for rinsing and drying foam brush. (Make sure to wash your brush after you are done with the project as the Mod Podge will dry on it making it hard and never usable again if you fail to do this step.)


How to begin:

•Think about the person you are making the hand mirror for and begin tearing out expressive words and phrases that positively describe them. (Tearing creates feathered edges and is more beautiful than cut edges when you adhere the pieces on the mirror.)

•Tear up pieces of scrap book paper and images that you have collected.

•Use your foam applicator brush to apply the Mod Podge to an area directly on the back of the mirror (not the glass side). Then place your paper scrap, image or word on top of the applied Mod Podge. Now, dip the brush into the Mod Podge and paint the top of what you just applied. Mod Podge dries clear! Make sure you apply enough to give the underside and top a GOOD coat.

•Continue layering all of your words and images using the Mod Podge. Layering is the key!

•Allow the Mod Podge to dry and then apply your embellishments with the hot glue gun!

Have fun! That is the most important part...and BE INSPIRED!

Detail of unfinished Hand Mirror

Thursday, November 4, 2010

Chocolate Candy with Fruit and Nuts – Thrifty Gifty #2


An easy and yummy treat for the holidays is chocolate candy with fruit and nuts.  I used to make this with my kids when they were smaller and it is easy and delicious.  You can use what you have in your pantry and it is sure to come out wonderful.  Package these little treats in small cupcake papers and then put them in a nice box or cellophane bag with a ribbon.  Give them to all the special people on your list.
 
Ingredients:
Semi-sweet chocolate chips (12 oz.)  Use a really good brand like Ghiradelli, for example. 
Crisco
Dried fruit of your choice (cut into small pieces if it is large fruit) such as raisins, craisins, apricots – about a ¼ Cup (adjust according to your likes.)
Nuts (unsalted) such as pecans, walnuts, cashews, pistachios, etc. – about a ¼ Cup. (adjust according to your likes.)


       Directions:
1.      Melt chocolate chips in a double boiler with a teaspoon of Crisco.
2.     Stir well and add dried fruit and nuts.
3.     Stir again to incorporate fruit, nuts and chocolate.
4.     Drop by teaspoonful onto waxed paper and let cool.  (You can put this in the refrigerator to cool more quickly.)
5.     Place each candy in a cupcake paper and package as directed above.
      Other ideas: 
·       You can use mini-marshmallows and nuts, that is really yummy too.

Wednesday, November 3, 2010

FEATURED

<center><a href="http://createandshareblog.blogspot.com/" target="_blank"><img border="0" alt="Create and Share" src="http://i100.photobucket.com/albums/m13/harveyusn/featued-on-button.gif" /></a></center>

Tuesday, November 2, 2010

Crock Pot Applesauce, easy, easy, easy!


Here is a great way to use up some old apples you might have lying around the house. If you don't have any old apples go to the food store and look in the reduced produce section. You can get apples for applesauce much cheaper this way!

• Bring apples home, peel them and chop them into 1 inch pieces. Add them to your crock pot.

•Put a small amount of water in the bottom of the crock pot. Add cinnamon to your taste (nutmeg is delicious, too.)

•Turn your crock pot to high for 2-3 hours (or low for a longer time.)

•When the apples are soft, either mash them or blend them into applesauce.
    This is delicious. It came out so sweet and I did not use any sugar! Your family will love this. Your kids will enjoy helping with this, too. Then send them to school with a healthy snack they made!

    Monday, November 1, 2010

    Becoming Blog Savvy


    Blogging is a brand new arena in which my mom and I have started to explore. We intend to keep our creative juices flowing by constantly engaging in creative endeavors so we can continue to post ideas that you can be inspired by.

    We have experienced a HUGE learning curve thus far as we are submerged in the blogging world and we would like to help you feel comfortable searching our blog without feeling overwhelmed by it.


    Here are a couple of tips to help you along. For those of you who are experienced readers or bloggers, post a comment if you have something helpful to add!

    1. Our blog is intended to inspire your creative side through tips, tutorials, photographs and more!

    How to "Follow"
    2. If you like our blog, you can become what is called a "FOLLOWER." A follower is someone who keeps track of what is going on with the blog. To "follow," find the word "follow" on the left hand side (side bar) of the screen under the words "Recent Readers/Followers." You will be prompted along and in the end, your name and photo, if you choose, will be on the right hand side of the page along with the "Recent Readers" who are also following publicly. You can also follow privately without anyone knowing that you are following us. This is an option as you are prompted along that you may select as well.

    If you would like to follow our blog via e-mail, which means getting an e-mail each time we update our blog, type your e-mail address into the little box on the left hand side of our blog immediately at the top, labeled "Follow All About Being Inspired by E-mail!"

    How to Read and Post Comments
    3. We would love to hear your comments on our posts and so would our other readers! To post a comment, scroll down to the bottom of the post and look for the light grey box, then click on
    "# comments."


    We would really like to encourage posts because this is the only way we get feedback from our readers. With this information, it can help us tailor our posts to your liking!


    Subscribe to a Feed
    4. If you are really feeling bold, which I hope you are, click on "Subscribe in a Reader." This is called a feed. When you do this, you will get updates as new posts are created. Just click on the words "Subscribe in a Reader" on the upper left side of the page and follow the prompts.

    Viewing Previous Entries
    5. To view previous blog entries, locate the Blog Archive on the left side of the blog (you might have to scroll down a bit) and click on the black arrows to expand or close the lists. When you find something you want to read, click on the words and it will direct you to the page.

    Be Bold in Exploring our Blog
    6. For those of you who are unsure about clicking around on the blog, don't be because you can't do anything to mess up! Be encouraged in your clicking around and explore what All About Being Inspired has to share with you!

    "Like"
    7. If you use Facebook and are a "Like" button person, we have added those under each post. Feel free to "Like."

    I hope this is an encouraging post for all of you who want to explore our blog in more depth!
    BE INSPIRED!

    Thrifty Gifties - Just in time for the Holidays!


    Keep checking back with us for thrifty ideas to use as gifts for the holidays for the people you love. We all know that the economy is causing us to tighten our belts a bit but we still want to express our love for them and NOTHING SAYS LOVE more than something you made with your own hands. So get your hands ready...here come the ideas!


    Decorated Soap-Thrifty Gifty #1

    Here is a great idea that everyone seems to love. These make great gifts for the hostess or as a stocking stuffer. You can make a set of them, one for each season, as a beautiful gift. Grab a box of soap, any nice soap you like and get out your scrapbooking papers, glue, stickers, scissors, tape, rubber stamps and pads, ribbon and glitter. Now get creative!

    1. Wrap the box of soap with nice paper.

    2. Wrap the covered soap with ribbon in a nice pattern and tape in place using double-sided tape.

    3. Decorate the box with stickers for specific themes or seasons.

    4. Add glitter for some extra glitz!

    Here are a few extra ideas to customize your soaps: Use Letter rubber stamps to personalize the soap, like a monogram. You can also use small cutouts from paper punches to add dimension. Use small dimensional flowers or leaves to make these soaps really special.

    Don't forget to get your kids in on the action! This is something they can make for all of their special people - grandparents, bus drivers, lunch ladies, girl scout leaders, teachers, etc.

    ***Let us know what you think about this idea and send us a picture of what you did. We will try to post your creations! 


    Thrifty Gifties, just in time for the holidays!


    Thrifty Gifty # 1, Decorated Soaps

    Keep checking in to see some thrifty ideas for gifts for the upcoming holiday season or for just anytime at all. We will be regularly posting thrifty ideas for giftgiving during November and December.

    We all know that the economy has caused us to tighten our belts a bit but we all want to express our love to those special people in our lives. NOTHING SAYS LOVE like something handmade. So get your hands ready...here come the ideas!

    What you will need: Scrapbooking paper, ribbons, glue, double-sided tape, rubber stamps, glitter, stamp pad, small dimensional flowers or other decorations.

    Directions:

    1. Cover boxed soap with paper. Glue or tape sides closed.

    2. Add ribbon to the box in a pleasing design.

    3. Decorate with stickers, rubber stamps, small dimensional flowers, and glitter.

    Some other ideas:


    • Get the kids in on the action! Let them make soaps for all of their special people: grandparents, bus drivers, lunch ladies, girl scout leaders, etc.

    • Use letter stamps to create a monogramed soap, very custom!

    • Create a "set" of soaps, one for each season to give as a very special gift.

    Post your thoughts and send us your pictures of your decorated soaps so we can post them for everyone else to see! Have fun!


    LinkWithin

    Related Posts Plugin for WordPress, Blogger...